Celeriac & Potato Gratin (3 Ways)

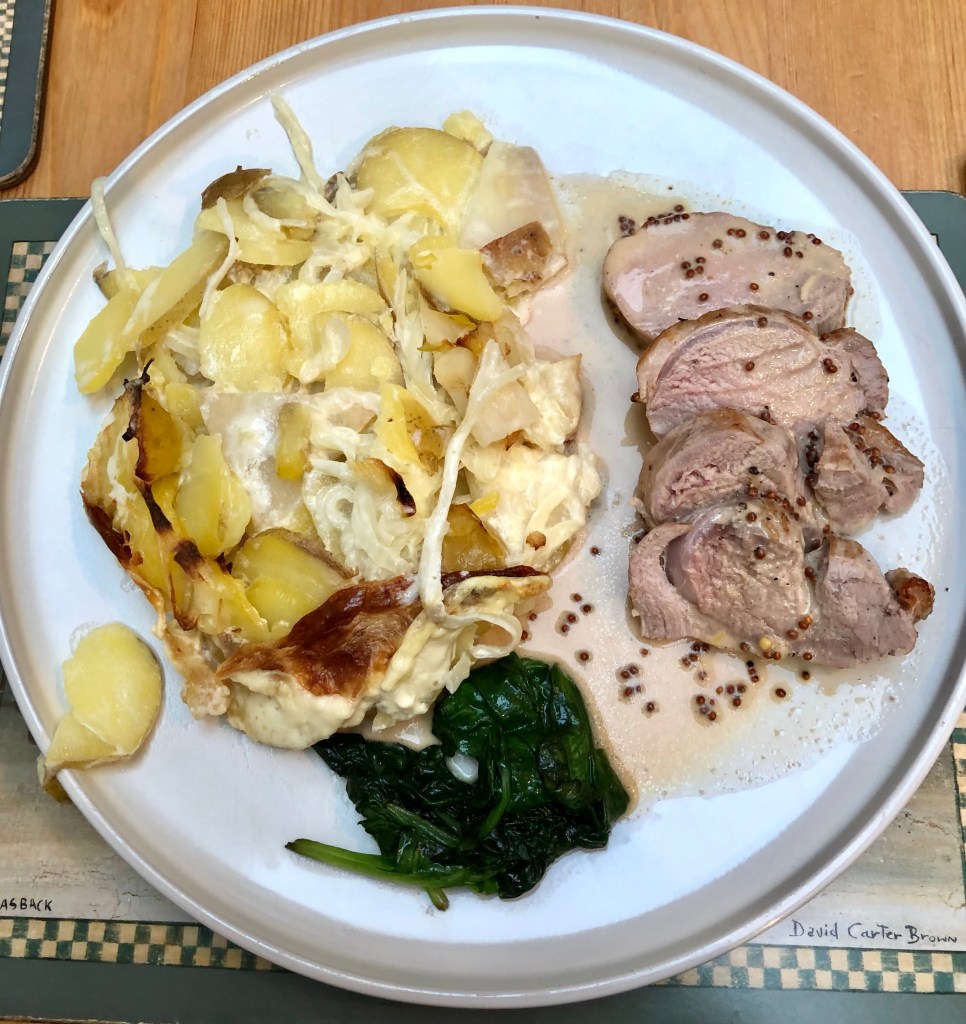
I’ve received quite a bit of celeriac in my veg. box delivery from Oddbox recently. My go to recipes with celeriac are normally soup & mash but I do like to vary my meals as often as possible and this week my partner suggested a gratin. As I already had potatoes and onions in the cupboard, it seemed like the perfect accompaniment to serve with Pork for a Sunday Dinner. There’s loads of recipes for celeriac gratin on-line, but here is my attempt. Feel free to adjust the quantities of celeriac & potato if you have different amounts to use up.

INGREDIENTS

  • Half a celeriac (approx 500g.) chopped in similar size pieces to the potato. (I peel with a knife post boiling as find it easier)
  • 600g potatoes halved or quartered depending on size. (I didn’t bother peeling but this is completely up to you)
  • 2 x small onions, finely sliced
  • 150ml cream
  • 150ml milk
  • Knob of butter
  • 2 x cloves of garlic
  • 1 x sprig of rosemary

METHOD

Parboil the celeriac & potato for 10 mins (I start with cold water & start the 10 mins when the water starts to boil)

Melt knob of butter in pan and slowly cook the onions over very low heat for 10 mins, or until they start to brown.

Add cream, garlic, rosemary and enough milk to cover the onions, bring to a simmer and then simmer very gently for 10 minutes. After the 10 minutes is up, remove the garlic cloves & rosemary sprig.

Slice the potatoes & celeriac thinly (I use a mandolin) & roughly layer in an ovenproof bowl pouring over some of the cream & onion mixture after each layer.

Top the final layer with any remaining onion mixture, and bake in the oven at 180c for approx 1 hour or until golden brown.

This dish is such a rich, hearty and alternative side to a Sunday roast and it makes for incredible leftovers. I think gratin is one of those dishes that almost tastes better second time around. On this occasion, I completely mixed up the leftovers and served with fried pancetta and fried egg for a incredibly tasty and wholesome mid-week dinner.

My 20 month old son also enjoyed a portion of the gratin, he’s had celeriac a few times and I think originally found the taste maybe a bit too strong, but this time coupled with the cream, he ate every single last bite. Remember that celeriac is an allergen to if your child hasn’t tried it before, start with small quantities. My tactic with my son is to continue to expose him to as many tastes as possible and offer again and again even if he has refused the item on one occasion. It can be hit or miss but he’s generally a pretty good eater and the things he does enjoy often amazes me.

Advertisement

Caerphilly Cheese Scones

On Saturdays’ check of the fridge, I discovered a whole host of dairy products dangerously close to their use by date. A couple of eggs, the remnants of a yoghurt pot and a whole block of Caerphilly cheese that I’d bought (despite all my own advice) in a BOGOF offer.

Lacking in inspiration, the only meal idea I could come up with was a cheese omelette and a high cholesterol omelette at that. Also, following a rather unhealthy few days of eating out, the thought of a cheese filled week was filling me with indigestive dread.

But a quick google search  came to the rescue showing  me that caerphilly cheese and eggs are the perfect base to a delicious batch of savoury scones. I followed the following recipe from  Goodtoknow.co.uk:

Ingredients

  • 200g (7oz) self-raising flour
  • Good pinch of cayenne pepperImage 5
  • 100g (3½oz) butter
  • 125g (4oz) Caerphilly cheese, grated
  • 3 spring onions, trimmed and finely chopped
  • 2 medium eggs, beaten
  • 2 level tbsp plain yogurt

The best thing about the recipe, was that I had all the items (except the spring onions) already in stock. I opted to buy a bunch to use later in the week,  but I’m sure the scones would still taste great without them.

Now I’m not much of a baker but even for the me the recipe was super simple to follow:

Method

  • Set oven to Gas Mark 6 or 200°C. Sift flour and cayenne pepper, into a bowl. Rub in the butter until it resembles fine breadcrumbs.
  • Add just over three-quarters of the cheese and the chopped spring onion, and mix well. Stir in the eggs and yogurt. The dough will be very soft. Knead very lightly on a floured surface.

I got to the breadcrumbs stage pretty quickly:

Image 1Image 4

However, I was uncertain about the consistency of my  dough. It was super sticky but rather than adding more flour to the mix, I just made sure my work surface and rolling pin was super floured and rolled extra gently.

Image 3

  • Pat out dough to about 2.5cm (1in) deep and cut out 5 rounds. Knead the trimmings and pat out, then cut out another 2-3 scones. Put the scones on the baking sheet and sprinkle with the rest of the cheese, and more cayenne, if you like.

I’m also not sure I’m very good at measuring as my scones certainly weren’t 1 inch deep.

Image 6

  • Bake for 20-25 minutes. Best served warm with butter and a sliver of cheese

Despite the sticky dough and my inability to measure, the scones turned out super fluffy and light and are a great snack sized portion.

Image The best thing about the scones is that they can be frozen, so 3 ingredients on the edge of their use by date have now become a great savoury snack to be eaten at a later date.

I also can’t wait to sample Goodtoknow.co.uk suggestion of having them as a savoury meal with some poached egg and spinach.

And, if you’re wondering what happened to the rest of the block of cheese and remaining spring onions, I discovered a delicious recipe for some Caerphilly Cheese & Leek Pancakes where I substituted the leeks for the left-over spring onions and half a red onion that I found in my fridge.

So from potential food waste came 2 delicious meals, all costing pennies in additional ingredients, and no boring omelette in sight.